Why You’ll Love This Recipe
When it’s pear season, don’t just eat them, this recipe is a great option to cook with them, plus it also has sage which I think they complement each other so well, so you’ll end up with a creamy fruity classic Italian pasta.
Recipe Ingredients
These are the ingredients that you’ll need to make this recipe:
For The Egg Pasta Dough:
- 00 flour or all purpose flour
- Semolina flour
- Kosher salt
- Eggs
For The Casoncelli Pasta Filling:
- Uncooked sweet Italian sausage
- Lean ground chicken or turkey
- Grana Padano cheese or Parmigiano Reggiano
- Unseasoned Panko breadcrumbs
- Amaretti cookies
- Pear
- Lemon zest
- Ground nutmeg
For The Pancetta Sage Brown Butter Sauce:
- Guanciale, pancetta, or bacon
- Unsalted butter
- Fresh sage leaves
- Freshly squeezed lemon juice
- Grana Padano cheese or Parmigiano Reggiano cheese
How To Make This Recipe
These are the instructions that you’ll need to follow to make this recipe:
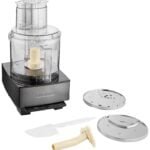
- Make The Egg Pasta Dough: Combine the 00 flour and the semolina, and a pinch of salt in a Food Processor fit with an “S” blade and run on high until the flours are well combined. With the food processor running, pour in the eggs and run until the dough comes together into a ball.
Turn the pasta dough onto a floured surface and knead it for until it becomes a smooth ball. Wrap in plastic wrap and set aside to rest for at least 30 minutes before using. - Make The Sausage And Pear Filling: Meanwhile, make the pasta filling. Combine the sausage and turkey meat in a medium nonstick pan over medium high heat and cook, breaking up the meat with the back of a wooden spoon, until the meat is cooked through. Set aside to cool briefly.
Once the meat is cool enough to handle, place it in the bowl of a 14-cup food processor fit with an “S” blade and add in all the remaining filling ingredients. Run the food processor on high until the mixture is well combined and all the ingredients are the same size. - Form The Candy Wrapper Pasta: When it comes to the pasta, you have two options for how to roll it out — by machine or by hand.
Secure a tabletop pasta machine to a counter or fit the Pasta Roller attachment onto the KitchenAid Stand Mixer. Cut dough into six pieces, then press each piece into a rectangle shape. Cover the parts you aren’t using with a kitchen towel so they don’t dry out.
Pull the roller adjustment knob straight out and turn to setting 1. Release the knob, making sure the pin on the roller housing engages the opening on the back of the adjustment knob, allowing the knob to fit flush against the roller housing.
Turn Stand Mixer to speed 2. Feed flattened lightly floured dough into rollers to knead. Fold dough in thirds, flatten, lightly flour, and roll again. Repeat until the dough is smooth and pliable and covers the width of the roller. Lightly dust pasta with flour while rolling and cutting to aid in drying and separation.
Feed dough through rollers to further flatten the sheet of dough. Change the roller to setting 3, and repeat the rolling process. Continue to increase roller setting until you reach setting 8. Do not fold the dough during this step. Cut dough as needed to make it wieldy.
Once all dough is rolled to setting 8, trim all the dough into 4-inch by 3-inch rectangles, lightly flouring as you go and discarding the scraps. When you have all the dough trimmed, arrange a few pasta rectangles on a lightly floured work surface and brush off any excess flour.
Add rounded 1/4 teaspoon of the filling to the center of one of the shorter ends of the dough. With a pastry brush dipped in water, brush a little water on the edges of the pasta. Starting at the end with the filling, roll the pasta into a cylinder. Then press down on either side of the pasta filling to seal the pasta. Pinch the sides, so you make the pasta into the shape of a candy wrapper.
Place filled pasta on a lightly floured cutting board or a lightly floured rimmed baking sheet and set aside while you repeat with all the remaining dough. Let pasta shapes dry at room temperature for at least 30 minutes before using. - Make The Pancetta Sage Brown Butter Sauce: Meanwhile, place the pancetta in a nonstick pan and cook on medium-high heat until the pancetta is crisp and browned. Remove pancetta from the pan and place it on a paper-towel-lined baking sheet.
Discard all but 2 tablespoons of fat drippings and return the pan to the stove over medium-high heat. Add sage leaves to the pan and cook until crisp. Remove pancetta from the pan and place it on a paper-towel-lined baking sheet.
Add butter to drippings in the pan, return to the stove over medium heat, and cook until butter turns nut-brown and smells toasty then turn heat to a minimum. - Cook The Pasta: Bring a large pot of heavily salted water to a boil over high heat. Reduce the heat to medium high and then cook the filled pasta in batches of about 10 pieces for 1 to 2 minutes then remove to a baking sheet with a slotted spoon. Continue to cook all the pasta.
- Finish The Pasta: When the pasta is just about done, reserve 2 cups of the cooking water. Drain the pasta and add it to the butter in the pan along with 1 1/4 cups of water and lemon juice. Cook until some of the water is absorbed and the pasta is perfectly al dente.
Remove from heat, and stir in cheese — the sauce should become creamy, thin it with a little more water, as needed. Gently stir in the filled pasta until it’s coated.
Season well with salt, and serve immediately garnished with pancetta and sage and passing additional grated cheese at the table.
A Classic Pasta From Lombardy
Ever since we launched our group trips to Northern Italy’s Lombardy region, we’ve fallen for the food of Lombardy and discovered so many flavors that are new to us from Manzo all’olio and mondeghili to sweets like torta sbrisolona.
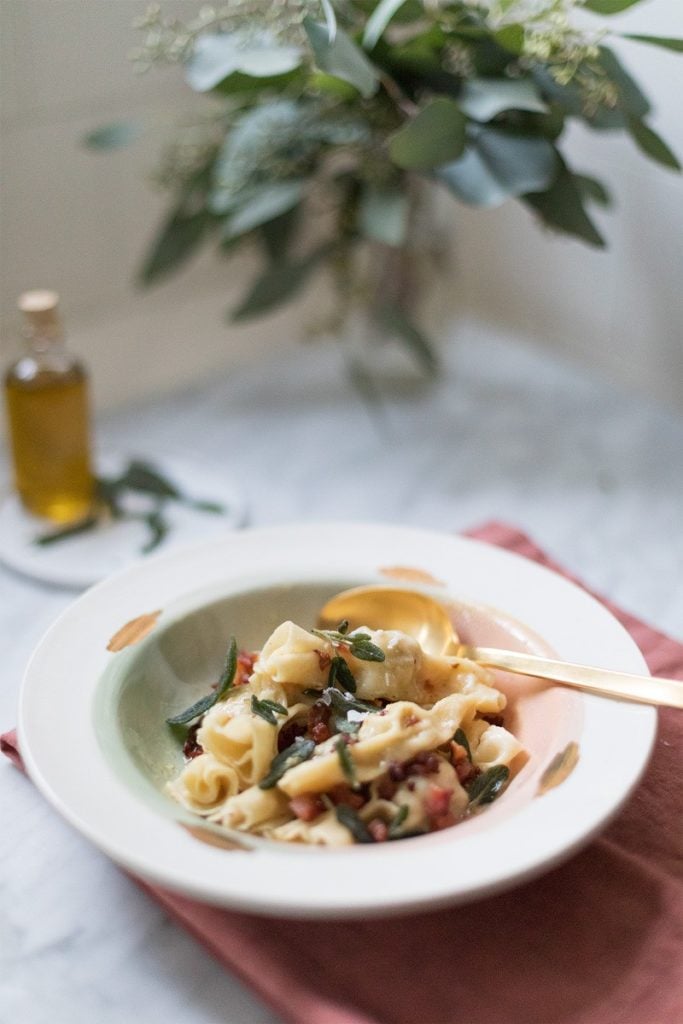
On one of those first trips to Lombardy, my food discovery was this candy wrapper-shaped pasta known as casoncelli (pronounced “cass-own-chell-ee” by the way) in Italian. They hail from Bergamo so they’re often also called casoncelli alla Bergamasca.
Oh, and they are also called casonsei (pronounced “cass-own-say”) in the local dialect so if you see any of those terms on a menu, know that they’re the same dish!
Here’s the thing: this pasta is undoubtedly from Lombardy, and everyone you come across will recommend you try it; however, no two casoncelli recipes are exactly the same.

What Is Casoncelli Pasta?
Across Lombardy, you’ll find this homemade pasta dough recipe with a slightly different filling—some stuffed with shredded pork, others with raisins and the local Grana Padano cheese, some with pears and amaretti cookies, and others without. And there are even slightly different shapes—some more of a half-moon while others, like these, resemble a candy wrapper.
What is consistent is that the casoncelli are a stuffed pasta that hails from the Lombardy region and uses ingredients that are 100%, Lombardy, from the local cheese Grana Padano and the butter sauce (this region of Italy uses butter more than olive oil!) to the local macaron-like cookies, amaretti biscuits, so you’re eating the flavors of the region with every bite.


What To Know Before You Make This Pasta
Yes, this recipe is an undertaking, as it’s about 3 hours from start to finish, so it’s the kind of recipe you’ll want to take on as a weekend project. But do make this pasta because it will quickly become one of your favorites!
By the way, this Casoncelli Pasta With Pancetta Brown Butter Sage Sauce recipe makes a lot of pasta because once you decide to make homemade pasta, you might as well go for it.
I make a full recipe, let the shaped pasta dry for a few hours at room temperature, then cook what I want to eat immediately and freeze the rest (by first freezing the pieces on an uncovered baking sheet and then combining them all in an airtight container for storage) for a later date.
The pasta will last up to two months in the freezer, so, if you want homemade pasta at your next dinner party or holiday feast, you can make them ahead of time, freeze them and then just cook them and the sauce the day of!
Oh, and if you don’t want to make the full recipe, that’s fine. The pasta dough is a workhouse dough perfect for shaped and filled pasta or tosses your favorite store-bought pasta in the uber-comforting smoky, sage-y brown butter sauce.

Have Us Plan Your Italy Trip
Looking to travel to Northern Italy to try this pasta for yourself? Head here to get started!
PIN IT FOR LATER!
Want to remember this recipe for a future dinner party? Go ahead and save it to your Pinterest board to access it later!

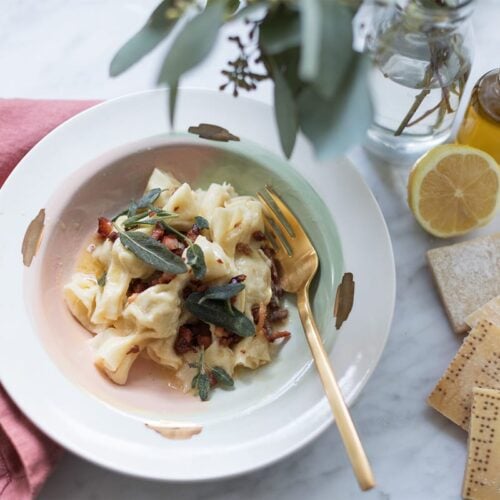
Casoncelli Pasta With Pancetta Sage Brown Butter Sauce Recipe
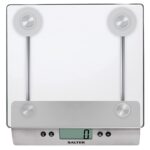
Equipment

Ingredients
For The Egg Pasta Dough:
- 2 1/2 cups 00 flour or all purpose flour
- 1 cup semolina flour plus more for rolling and shaping dough
- Pinch kosher salt
- 6 large eggs beaten
For The Casoncelli Pasta Filling:
- 1/2 pound uncooked sweet Italian sausage casing removed and meat crumbled
- 1/2 pound lean ground chicken or turkey
- 1 1/2 cups finely grated Grana Padano cheese or Parmigiano Reggiano
- 1/2 cup unseasoned Panko breadcrumbs
- 6 amaretti cookies
- 1 medium firm-ripe pear small dice
- Zest 1 medium lemon
- Pinch ground nutmeg
For The Pancetta Sage Brown Butter Sauce:
- 4 ounces guanciale, pancetta, or bacon
- 4 tablespoons unsalted butter
- 60 small fresh sage leaves
- Juice 1 medium freshly squeezed lemon juice
- 2 cups finely grated Grana Padano cheese or Parmigiano Reggiano cheese
Instructions
- Make The Egg Pasta Dough: Combine the 00 flour and the semolina, and a pinch of salt in a Food Processor fit with an “S” blade and run on high until the flours are well combined. With the food processor running, pour in the eggs (make sure they’re well beaten) and run until the dough comes together into a ball. Turn the pasta dough onto a floured surface and knead it for 8 to 10 minutes until it becomes a smooth ball. Wrap in plastic wrap and set aside to rest for at least 30 minutes before using. TIP: Dough can be made up to one week ahead. Store wrapped in the refrigerator then bring to room temperature for at least 30 minutes before rolling.
- Make The Sausage And Pear Filling: Meanwhile, make the pasta filling. Combine the sausage and turkey meat in a medium nonstick pan over medium high heat and cook, breaking up the meat with the back of a wooden spoon, until the meat is cooked through. Set aside to cool briefly. Once the meat is cool enough to handle, place it in the bowl of a 14-cup food processor fit with an “S” blade and add in all the remaining filling ingredients. Run the food processor on high until the mixture is well combined and all the ingredients are the same size.TIP: The meat can be cooked up to 2 days ahead. Store refrigerated in an airtight container until ready to use.
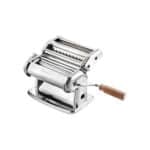
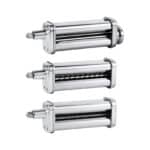
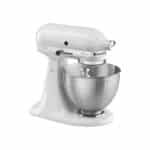
- Form The Candy Wrapper Pasta: When it comes to the pasta, you have two options for how to roll it out -- by machine or by hand. If you're going to make pasta often, consider investing in a classic Imperia Pasta Machine (or even get the KitchenAid Pasta Attachment for your stand mixer) and then follow the instructions here. However, you can also roll it out by hand with the help of a rolling pin or even a wine bottle. For tips on that, watch this video by Chef Evan Funke.Secure a tabletop pasta machine to a counter or fit the Pasta Roller attachment onto the KitchenAid Stand Mixer. Cut dough into six pieces (they need to fit in the Pasta Roller), then press each piece into a rectangle shape. Cover the parts you aren't using with a kitchen towel so they don't dry out. Pull the roller adjustment knob straight out and turn to setting 1. Release the knob, making sure the pin on the roller housing engages the opening on the back of the adjustment knob, allowing the knob to fit flush against the roller housing.Turn Stand Mixer to speed 2. Feed flattened lightly floured dough into rollers to knead. Fold dough in thirds, flatten, lightly flour, and roll again. Repeat until the dough is smooth and pliable and covers the width of the roller. Lightly dust pasta with flour while rolling and cutting to aid in drying and separation.Feed dough through rollers to further flatten the sheet of dough. Change the roller to setting 3, and repeat the rolling process. Continue to increase roller setting until you reach setting 8. Do not fold the dough during this step. Cut dough as needed to make it wieldy. Once all dough is rolled to setting 8, trim all the dough into 4-inch by 3-inch rectangles, lightly flouring as you go and discarding the scraps. When you have all the dough trimmed, arrange a few pasta rectangles on a lightly floured work surface and brush off any excess flour. Add rounded 1/4 teaspoon of the filling to the center of one of the shorter ends of the dough. With a pastry brush dipped in water, brush a little water on the edges of the pasta. Starting at the end with the filling, roll the pasta into a cylinder. Then press down on either side of the pasta filling to seal the pasta. Pinch the sides, so you make the pasta into the shape of a candy wrapper. Place filled pasta on a lightly floured cutting board or a lightly floured rimmed baking sheet and set aside while you repeat with all the remaining dough. Let pasta shapes dry at room temperature for at least 30 minutes before using. TIP: Pasta can be made up to one month ahead. Store wrapped in the freezer until ready to use then cook the frozen pasta (don't let it thaw) in boiling water
- Make The Pancetta Sage Brown Butter Sauce: Meanwhile, place the pancetta in a 3.3-quart nonstick pan and cook on medium-high heat until the pancetta is crisp and browned. Remove pancetta from the pan and place it on a paper-towel-lined baking sheet. Discard all but 2 tablespoons of fat drippings and return the pan to the stove over medium-high heat. Add sage leaves to the pan and cook until crisp. Remove pancetta from the pan and place it on a paper-towel-lined baking sheet.Add butter to drippings in the pan, return to the stove over medium heat, and cook until butter turns nut-brown and smells toasty then turn heat to a minimum. TIP: Pancetta can be crisped up to 8 hours ahead of time. Store at room temperature in an airtight container. The sage can be crisped up to 1 day ahead of time. Store at room temperature in an airtight container.
- Cook The Pasta: Bring a large pot of heavily salted water to a boil over high heat. Reduce the heat to medium high and then cook the filled pasta in batches of about 10 pieces for 1 to 2 minutes then remove to a baking sheet with a slotted spoon. Continue to cook all the pasta.
- Finish The Pasta: When the pasta is just about done, reserve 2 cups of the cooking water. Drain the pasta and add it to the butter in the pan along with 1 1/4 cups of water and lemon juice. Cook until some of the water is absorbed and the pasta is perfectly al dente. Remove from heat, and stir in cheese — the sauce should become creamy, thin it with a little more water, as needed. Gently stir in the filled pasta until it's coated.Season well with salt, and serve immediately garnished with pancetta and sage and passing additional grated cheese at the table.
