Walnut shortbread cookies offer a delightful twist on the classic shortbread, incorporating walnuts’ rich, nutty flavors into every bite. This Italian walnut shortbread cookie recipe brings a touch of Italy to your kitchen with simple yet luxurious ingredients that bake into a tender, crumbly cookie perfect for any occasion.

Some things cause a more sentimental reaction than others, like these Italian Walnut Shortbread Cookies.
And there’s nothing like the one-two combo of the end of the year and the holiday season to bring it out. That ornament that you handmade in kindergarten; the nutcracker your siblings broke (and then superglued together) in 1990-something; the annotated and vanilla-splotched recipe your grandmother passed down to your mother—you don’t dare get rid of one bit of it.
Why You’ll Love This Recipe
These cookies are straightforward to make but deliver a sophisticated flavor and texture that makes them seem anything but simple. The addition of finely chopped walnuts provides a satisfying crunch that complements the buttery softness of the shortbread. Ideal for serving with afternoon tea or as a festive treat, these cookies are versatile and delicious.

Recipe Ingredients
Here are the ingredients needed to make these Italian Walnut Shortbread Cookies:
- 3 cups unbleached all-purpose flour
- 1 tablespoon baking powder
- 1 pinch sea salt
- 3/4 cup unrefined granulated sugar
- 8 ounces cold Earth Balance® Buttery Sticks, cut into small pieces
- 8 ounces (about 2 1/3 cups) walnuts, finely chopped
- 1/4 cup canola, grapeseed, or coconut oil
- 1 tablespoon pure vanilla extract
- 2 tablespoons vanilla almond milk or your favorite nut milk
- For Decorating:
- 2 cups Frosting for decorating
- Turbinado or sanding sugar for decorating
How to Make This Recipe
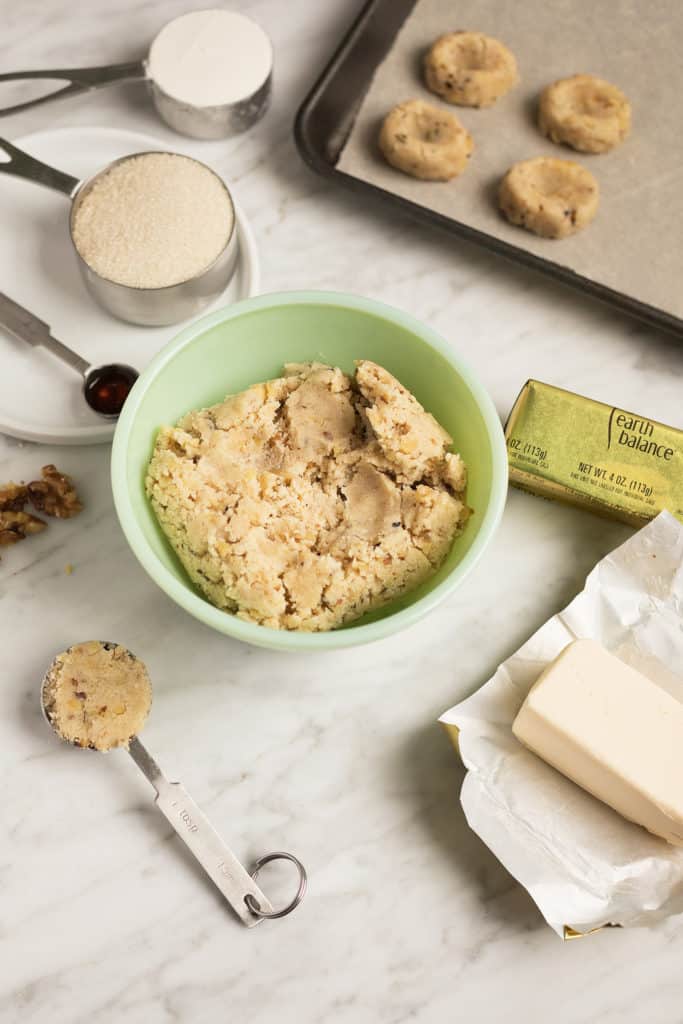
To make these Italian Walnut Shortbread Cookies, begin by whisking together the flour, baking powder, sugar, and salt. Work the cold butter into the dry ingredients until pea-sized crumbs form, then add the chopped walnuts.
Create a well in the center of your mixture to add the oil, vanilla extract, and nut milk, blending until the dough forms a cohesive mass. Shape the dough into oblong cookies, indent with a thumbprint, and chill before baking to ensure they hold their shape.
Bake until golden and cool before decorating with your choice of frosting and a sugar sprinkle for extra sweetness and texture.

What Do Italian Walnut Cookies Taste Like?
You need to know that these cookies are a hit because of their texture and subtle flavor. They’re a perfect mix of crumbly, chewy, sweet, and salty.
The butter makes these cookies super tasty, and the eggs keep the dough workable, so I wanted to make sure I could make the swap and still get that signature texture.
After a few rounds of tweaks, my mother (who is the authority on making these cookies) taste-tested them and couldn’t tell the difference between the original Shortbread Italian Walnut Cookies and the ones where I had made the swap.
So here they are, an updated version of this classic cookie (in our family, at least) that’s so subtly sweet and perfectly textured (but super easy to make) that they’re destined to become your new holiday treat!

Cookie Baking Tips
Here are a few key tips for baking these cookies:
Make The Dough As Hydrated As Possible
The amount of liquid in this recipe works fabulously in most places. However, if you live in a particularly dry environment, you will want to add in more liquid in the form of milk. The dough is optimally hydrated once it holds together and feels almost greasy on your hands (thanks to the oil from the nuts), but it doesn’t stick to your hands.
Chill The Dough Before Baking
As with all cookies, we recommend you chill the dough before baking it. While you can skip this step, we feel it makes your cookie dough well hydrated and makes for a better final result.
When we have time, we rest the formed cookie dough in the refrigerator for about 30 minutes before shaping and then chill th formed cookies about 5 to 10 minutes before baking.
Don’t Overbake The Cookies
Just bake the cookies until the undersides are golden brown, which may mean that the tops don’t get any color, FYI. This usually takes 10 to 15 minutes depending on your stove and if they cookies chilled or not before baking.
Let Cool Briefly On The Cookie Sheet
These cookies are delicate when they first come out of the oven so let them cool for a minute or two before carefully remove them to a cooling rack.
Let Cool Completely Before Frosting
Make sure the cookies are completely cool before frosting.
Don’t Overdo The Frosting
Speaking of, don’t overdo the frosting. You want about 2/3 of the top of each cookie covered by frosting. Set the frosted cookies aside to “dry” (at least 30 minutes) before packaging.

High Altitude Adjustments
We tested these cookies at an altitude of 8,000 feet and made the following adjustments:
- Remove 2 tablespoons flour from the dough
- Add in 2 tablespoons milk
- Cut the baking powder back to 1 1/2 teaspoons
- Bake at 400°F for 10 minutes


More Shortbread Recipes
Here are additional shortbread recipes that we think you’ll love!
Get A Personalized Travel Itinerary

Noni's Italian Walnut Shortbread Cookie Recipe
Ingredients
For The Walnut Shortbread Cookie Dough:
- 3 cups unbleached all-purpose flour
- 1 tablespoon baking powder
- 1 pinch sea salt
- 3/4 cup unrefined granulated sugar
- 8 ounces cold Earth Balance® Buttery Sticks cut into small pieces
- 8 ounces (about 2 1/3 cups) walnuts finely chopped
- 1/4 cup canola, grapeseed, or coconut oil
- 1 tablespoon pure vanilla extract
- 2 tablespoons vanilla almond milk or your favorite nut milk
For Decorating:
- 2 cups Frosting for decorating
- Turbinado or sanding sugar for decorating
Instructions
- Make The Cookie Dough: Combine the flour, baking powder, sugar, and salt in a large bowl and whisk until well combined. Add the butter and walnuts. But first, rub the butter between thumb and forefingers to incorporate into flour mixture until butter is in lima bean-sized pieces. Then mix and rub the lima bean-sized butter pieces into flour mixture until the flour and butter mixture forms pea-size pieces (some big chunks should remain). It will also come together in fist-sized clumps when squeezed, about 3 minutes.
- Make a well and add the oil, vanilla, and almond milk. Rake your hand through the mixture to help moisten the flour with the wet ingredients. Keep mixing and start to gently knead until the dough is evenly combined, it comes together easily, and is moist but not sticky. Line two rimmed baking sheets with parchment paper.
- Shape The Cookies: Scoop the dough into flush 1-tablespoon balls and form into oblong cookies. Place at least 1-inch apart on the prepared baking sheet and press a thumbprint into the center of each cookie, about 1/4-inch deep. Place the formed cookies in the refrigerator to chill for at least 5 minutes before baking.
- Bake The Cookies: Heat an oven to 375°F, arrange a rack in the middle, and place cookies in the fridge until the oven heats up, at least 10 minutes. Bake until cookies are golden brown on the bottom, about 12 to 15 minutes. Let cool at least 15 minutes before frosting. Frost, top with sanding sugar, if using, and serve.