We should really call this how to make homemade ricotta cheese with a caveat.
That’s because this is and isn’t ricotta cheese. You see, authentic ricotta is made by reheating and cooking the whey that results from cheesemaking. But, frankly, most of us home cooks don’t have whey on hand. And it feels silly to make a batch of cheese to make ricotta.
Of course, if you’re already making homemade cheese and have whey leftover, by all means, try your hand at the traditional method. But for every other time, turn to this recipe that uses a workaround technique involving nothing more than cream, milk, and acid, and sometimes in the oven.
What Is Ricotta?
To get technical, ricotta is not cheese but a dairy byproduct because it is recooked (or “ricotta”) whey. However, in the United States, it’s commonly called cheese.
Some versions of ricotta date back to Roman times and are believed to have originated in Sicily (where it was likely made with sheep or goat milk).
The Italian kitchen has long operated on the premise that you shouldn’t waste any ingredients, and that mentality resulted in this “cheese.”

How To Make Traditional Ricotta
Before we get into this homemade ricotta technique, let’s go over how ricotta is traditionally made. You can read a lot in this Serious Eats article (where we first came across the ingenious oven technique we use in this recipe).
But, to sum it up, ricotta came about as a way to use the watery whey that separates from the curds during cheesemaking.
If you’re making it with a whey base (i.e., the traditional method), you start by heading milk to pasteurize it. Then you’d add something (traditionally cow rennet enzymes) to acidify and coagulate the mixture.
Finally, you’d remove the curds and let them drain. Our homemade ricotta recipe uses a similar technique, except no whey is involved.
Why Make Homemade Ricotta?
Unless you’re fortunate enough to live near a top-quality cheese shop or deli that makes its ricotta or sells a top-notch version like the Bellwether Farms, you’re probably buying crappy ricotta. As in a rubbery, tasteless, overly-manipulated product that is unappealing.
The taste of great ricotta will be fresh, sweet, creamy, and have a pleasantly uneven texture that adds a lot. And making homemade ricotta is pretty simple. Once you get the hang of it, you’ll be able to make it regularly without too much thought.
Easy Homemade Ricotta
This technique is essentially the same as that used for making Farmer’s Cheese, with two exceptions. First, heavy cream is added to provide richness, and second, the mixture is cooked in the oven for about 30 minutes to give it that distinct “cooked” flavor that authentic ricotta has.
Tips To Make This Recipe
This recipe can be scaled up or down as desired.
Don’t Use Ultra-Pasteurized Milk
You can use pasteurized, homogenized, and/or cream-line milk, but do not use ultra-pasteurized milk, as it will not work.
Switch The Milk
Feel free to try it out with goat, sheep, or buffalo milk but make sure to heat it’s pasteurized or, if you get it raw, to heat it adequately to make it safe to use.
Use Low Fat Milk
Low-fat milk is a-ok to use, but it will result in a cheese that tastes leaner and will not be as creamy.
Bake Until Curds Are Separate
Using the oven to make the cheese means a “less-is-more” approach is critical. Resist the urge to stir the mixture and give it time (up to 35 minutes in the oven, if necessary) to set.
Choose Your Acid
Distilled white vinegar creates the most neutral flavor, while lemon juice adds just a touch of lemony flavor; that can be good in some applications (like, say, if you’re dolloping the ricotta on pancakes) but may not be desirable in others.
Salt
I prefer not to add salt since the ricotta can always be seasoned later, but feel free to add a pinch if you like.
Don’t Make Too Much
Ricotta is a fresh product, so it should be eaten within 2 to 3 days of being made. This recipe will make about 1/4 pound of ricotta, so scale up if you need more for making recipes.
Don’t Ditch The Whey
The whey is a powerhouse liquid that’s full of good bacteria. Use it in smoothies, marinate meats, or make traditional ricotta.
Dive Deeper Into Cheesemaking
If cheesemaking interests you, you’ll want to get this classic cookbook that has all sorts of recipes: The Cheese Lover’s Cookbook and Guide: Over 150 Recipes with Instructions on How to Buy, Store, and Serve All Your Favorite Cheeses.
What To Make With Ricotta Cheese
Ricotta can be heated without melting, making it an excellent option for topping pizza, filling pasta like ravioli, as well as in classic Sicilian desserts like cannoli and cassata cake.
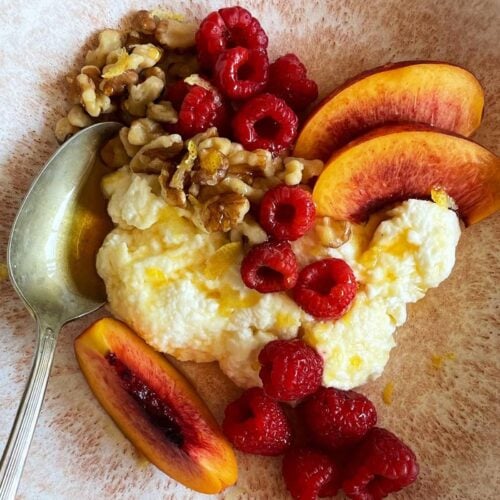
We use ricotta cheese in all sorts of dishes like pizza with caramelized onions and spinach, a twist on Classic Caprese Salad where you use ricotta instead of burrata or buffalo milk mozzarella, and appetizers such as these Gougeres Tea Sandwiches. And we love having it the traditional Italian way: for breakfast, topped with seasonal fruit, honey, and some toasted nuts.
Here are a few other recipes you could make with this fresh ricotta:
- Smashed Berry Lavender Toast
- Smashed Pea Crostini With Whipped Ricotta
- Asparagus Ricotta Baked Eggs
- Zucchini Ricotta Frittata
- Charred Asparagus With Requeson And Mexican Dukkah
- Herb Ricotta Ravioli Pasta
- Sweet Sausage Ricotta Lasagna
- Raw Zucchini Lasagna
- Torta di Ricotta e Polenta
- Amalfi Pear Ricotta Hazelnut Cake
- Pumpkin Spice Ricotta Cheesecake Bars Recipe
Okay, now it’s time to stock up your pantry with all the Italian essential ingredients, then try your hand at making this, and then share your creation with us by tagging @saltandwind and #swsociety on social!
Homemade Ricotta Cheese Recipe
Equipment

Ingredients
- 4 cups whole milk
- 1 cup heavy cream
- 2 teaspoons kosher salt
- 2 tablespoons lemon juice freshly squeezed or distilled white vinegar
Instructions
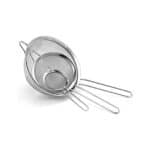
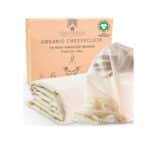
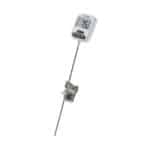
- Prepare The Colander: Line a colander, a fine-mesh strainer, or a large sieve with 2 to 3 layers of dampened cheesecloth and set it in a large bowl. Attach an instant-read digital thermometer to the side of a heavy-duty 7- to 8-quart ovenproof pot.
- Warm The Milk and Cream: Put the milk and cream in the pot and warm it over medium heat, stirring regularly with a silicone spatula until it’s 185°F. Meanwhile, heat the oven to 185°F and arrange a rack in the middle.4 cups whole milk, 1 cup heavy cream
- Add The Lemon Juice or Vinegar: Immediately remove from the heat, stir in the salt, and then slowly drizzle the 2 tablespoons of vinegar or the fresh lemon juice over the surface of the milk mixture.2 tablespoons lemon juice, 2 teaspoons kosher salt
- Cook The Curds: Transfer the pot to the oven and “cook” at 185°F for 20 to 25 minutes. After this time, the milk should have separated into clumps of milky white curds and thin, watery, yellow-colored whey — dip your slotted spoon into the mix to check.
If you still see a lot of un-separated milk, add another 1/2 tablespoon (as in 1 1/2 teaspoons) of lemon juice or vinegar and wait a few more minutes. - Drain The Curds: Gently ladle the big curds into the prepared colander. Carefully pour the remaining curds and the whey through the strainer. (Removing the big curds first helps keep them from splashing and making a mess as you pour.)
Let the ricotta drain until it reaches your desired consistency, 30 minutes for soft ricotta and up to 90 minutes for firmer ricotta. Refrigerate it if you let it drain for more than 45 minutes. Transfer the drained fresh ricotta to an airtight container and refrigerate. Use within 3 days.
